Purchasing the Drywall and Supplies
Before we could start drywalling, I had to order the drywall and supplies for this project. I purchased sheets of standard 4′ by 8′ (1/2″ thick) drywall from Home Depot. They delivered it to our home for a fee and placed it on the driveway near our garage door entrance. I would have gladly paid for the delivery person to carry the drywall down to our basement, but sadly they did not offer this service. So, my husband and I brought them in and painstakingly carried them down the stairs one at a time- all 80 pieces of drywall. It turns out that I estimated exactly correctly and we used every single sheet we purchased. Keep in mind that this was for our entire 800-square-foot basement. I got a good deal on the drywall as there was a sale at Home Depot and I also applied for their credit card and got an additional discount.
Tools of the Trade
In addition to drywall, you will also need drywall screws (a lot!), a 4-foot-long drywall T square, a pencil, a measuring tape, a utility knife and replacement blades, a drywall lifter, serrated drywall saw, a drywall rasp, putty/joint knives, a drywall trowel, mud pan, drywall tape, drywall mud, paper corner bead for exterior corners, sandpaper, sanding block, circular sander with long handle, and a face mask.
Essential power tools include a drywall screw gun, a handheld electric drywall router, and a hole saw set and power drill. A drywall lift to raise up the drywall to the ceiling and hold it in place while we screwed the drywall in place was also invaluable.
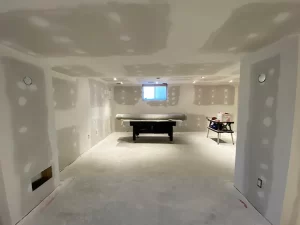
Strapping the Ceiling
Before we could start drywalling the ceiling, we had to apply strapping to the ceiling. The purpose of strapping is to provide a sufficiently wide solid support to screw the drywall onto. Strapping needs to be wide enough to allow for two rows of screws along abutted drywall edges. We used 1 by 3 strapping boards. I carefully planned out their placement so that the drywall seams would lie precisely on the strapping pieces and that the screws would be evenly spaced throughout each drywall piece.
Basement Drywalling Tips and Tricks
Tip #1
Invest in a good basement finishing book, like Remodeling a Basement by Roger German. After reading the drywalling section over a few times, I felt confident about what we were going to do. Make sure you know your local code regarding drywall materials and clearances around fireplaces and heat sources as well as drywall screw spacing.
Tip #2
For anything you still don’t know how to do, watch a few YouTube videos from professional sources. Vancouver Carpenter was our go-to source for all drywalling tutorials.
Tip #3
Invest in the proper tools to make your job easier. We used a drywall T square, drywall lifter, serrated drywall saw, drywall rasp, putty/joint knives, drywall trowel, mud pan, paper corner bead for exterior corners, circular sander with a long handle, drywall screw gun, drywall router, hole saw set and drill, and a drywall lift. Many of these items can be purchased second-hand to save money.
Tip #4
Don’t fret if a few of your drywall pieces arrived damaged. Many cuts will be necessary and it’s easy to just cut off the damaged parts. Save the perfect pieces for the pieces you will be installing whole.
Tip #5
Always install drywall factory edges next to factory edges and cut edges next to cut edges. Factory edges are pinched in a little and will create a gap if placed next to a cut edge.
Tip #6
Follow the old adage measure twice, cut once to avoid wastage.
Tip #7
Use the slightly more expensive paper over metal corner bead. It’s easy to work with and produces a durable outer corner for walls and bulkheads.
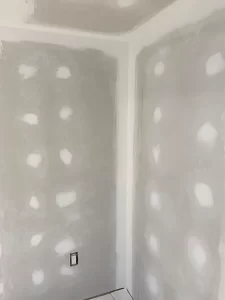
Tip #8
Allow the drywall mud to dry for 24 hours before attempting to sand.