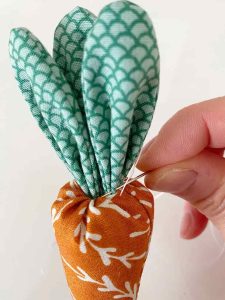
One of the things I love most about Easter decor is the whimsical charm of bunnies and carrots. Therefore, I happily display bunnies of all shapes and forms, including ceramic, wood, concrete, and moss, throughout our home. Additionally, I’m actively trying to find more ways to incorporate carrots into my decor scheme too. One of my most popular spring items in my Etsy shop is my fabric carrots. I’ve been making these for over a decade for friends and family and wanted to share my handmade fabric carrot tutorial with you. I’m excited to share that I’m currently creating a whole line of fabric garden vegetables that I can’t wait to share with you soon.
Fabric
The best part about this project is that it is very economical, only requiring small amounts of fabric. You can use fabric scraps if you have them or simply purchase a fat quarter or quarter meter or yard of fabric at your local fabric or quilting store. I purchase most of my fabric at a local store called Maker Savvy. To complete this project you will need to have some basic sewing skills and I recommend using a sewing machine, though the project can be completed with hand stitching alone.
At the end of this post, I will share a few ideas for how to display your fabric carrots. If you plan on making more than a few carrots, I recommend choosing a variety of coordinating fabrics. Most importantly, don’t be limited to just orange as carrots come in a variety of colours from white to yellow to purple. Choose a 100% cotton quilting fabric for ease of assembly as anything heavier will make assembling the carrots a challenge. The finished carrots are 7″ long, and you can scale up the pattern to produce larger carrots.
Materials For The Handmade Fabric Carrot Tutorial
- Pattern, printed onto cardstock
- Fabric for carrots (1/4 metre or yard is sufficient for a dozen or so carrots)
- Fabric for carrot tops (1/4 metre or yard is sufficient for a dozen or so carrots)
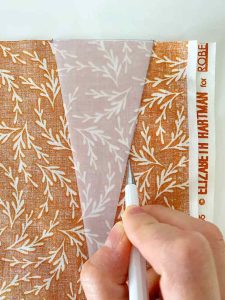
- Pencil or fabric marker
- Fabric scissors
- Pinking shears (optional)
- Sewing machine and thread to coordinate with the fabric
- Polyester stuffing
- Chopstick for inserting stuffing
- Hand sewing needle and sturdy thread
- Twine or yarn if you wish to make a garland, approximately 1.5 metres or 5 feet